Installing Kali Linux on VMware

This guide will walk you through the entire process of setting up a Kali Linux virtual machine using VMware Workstation or Player. This is an excellent way to learn penetration testing and ethical hacking in a safe, isolated environment.
Step 1: Download Required Files
Before you begin, you need to download two main things:
- VMware Workstation Player: Get the free version of VMware Player from the official VMware website.
- Kali Linux ISO Image: Download the latest version of the Kali Linux ISO from the official (Kali Linux 4GB) Kali Website.

Step 2: Install VMware Player
Install VMware Player on your host operating system (Windows, macOS, or Linux). The installation process is straightforward: just follow the on-screen instructions.
Step 3: Create a New Virtual Machine
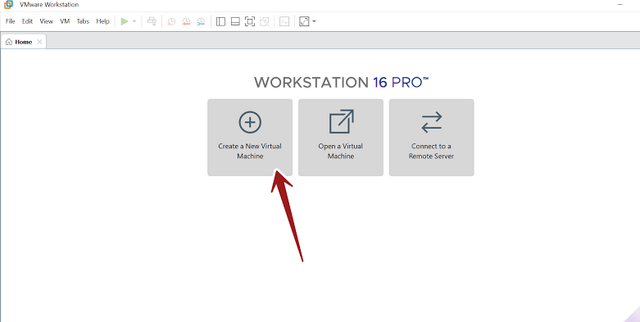
Open VMware Workstation Player and follow these steps to create your Kali VM:
- Click on "Create a New Virtual Machine."
- Select "Installer disc image file (iso)" and browse to the location where you downloaded the Kali Linux ISO.
- Click "Next."
- Choose your Guest operating system: "Linux," and for the Version, select "Debian 11.x 64-bit" (since Kali is based on Debian).
- Give your virtual machine a name (e.g., "Kali Linux") and choose a location to save its files.
- Set the disk size. A minimum of 20GB is recommended. Select "Store virtual disk as a single file."
- Click "Finish."
Step 4: Configure Virtual Machine Settings
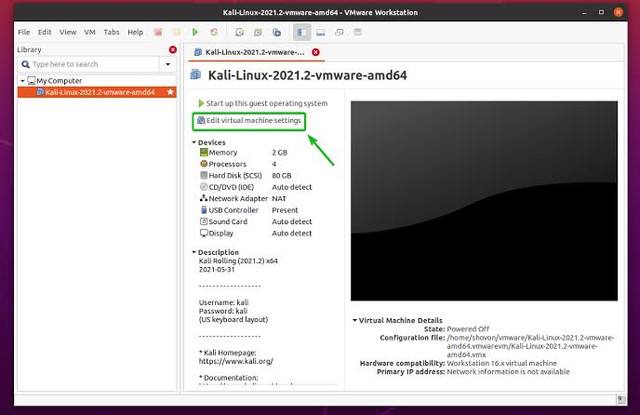
Before powering on, it's a good idea to adjust the settings. On the main screen, click "Edit virtual machine settings."
- Memory: Allocate at least 2GB (2048MB) of RAM. More is better if your host machine can spare it.
- Processors: Set the number of cores to at least 2.
- Network Adapter: Ensure it's set to "NAT (Network Address Translation)" for most use cases, as this provides internet access for the VM.
Step 5: Install Kali Linux
Now you can start the installation process.
- Click "Power on this virtual machine."
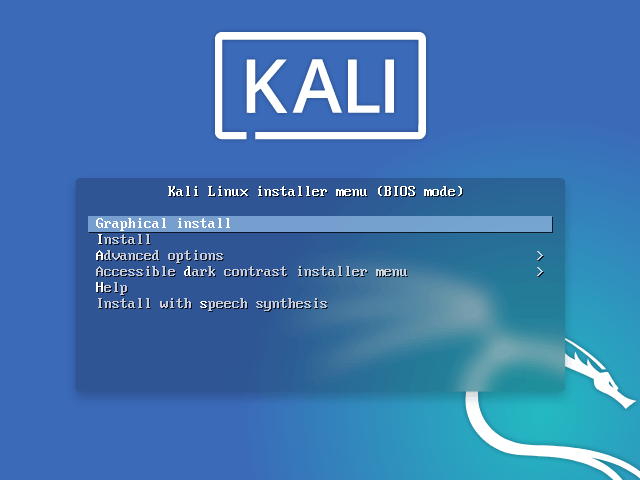
- A boot screen will appear. Select "Graphical install" and press Enter.
- Follow the on-screen prompts to set your language, location, and keyboard layout.
- During the installation, you'll be asked to set up your username and password. This is a crucial step!
- For the partitioning method, select "Guided - Use the entire disk." This will automatically partition the virtual disk.
- The installer will now begin copying files and setting up the system. This may take some time.
- When prompted to install the GRUB boot loader, select "Yes" and choose the virtual disk (e.g., /dev/sda).
- Once the installation is complete, click "Finish" and the VM will restart.
Step 6: Log In and Update
After the restart, you will be greeted by the Kali login screen. Log in with the username and password you created during installation. Once logged in, open a terminal and run the following commands to ensure your system is up to date:
sudo apt update
sudo apt full-upgrade -y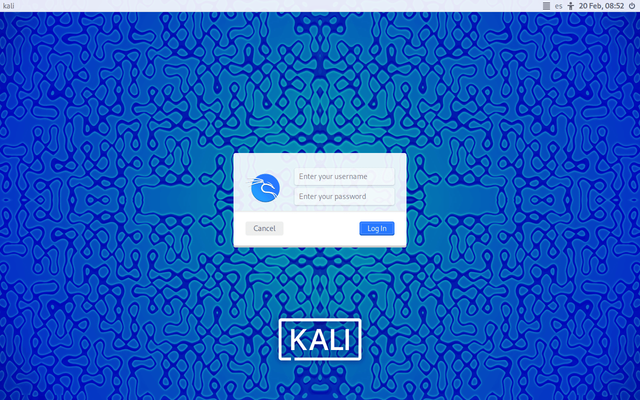

Congratulations! You now have Kali Linux running on a virtual machine.
Comments